Hypatia Create Help
for Google Workspace and Microsoft Office
Having issues? See Troubleshooting.
1 Installing the add-on
1.1 For individual computers (Google Workspace)
Install the Hypatia Create add-on for Google Docs, Slides and Forms just like you would install any other add-on. From the Extensions / Add-ons menu, choose Get add-ons. Search for ‘Hypatia Create’ and click INSTALL.
Alternatively, go directly to the Hypatia Create page in the Google Workspace Marketplace, and click INSTALL.
When you see the Get ready to install pop-up saying "Hypatia needs your permission to run", click CONTINUE. You'll have to sign in with your Google account and grant Hypatia necessary permissions. After you click Allow on the first pop-up and DONE on the second, Hypatia Create will be installed under the Add-ons menu and ready.
1.2 For individual computers (Microsoft Office)
To install Hypatia Create add-in for Microsoft Word and PowerPoint click on Add-ins in the Home menu, then More Add-ins and search for ‘Hypatia Create’. Then click Add and Continue.
Alternatively, you can go directly to the Hypatia Create page in Microsoft Apps and click Get in now.
2 Using the Full Editor (dialog)
Please note that it’s not possible to open the Full Editor directly in Microsoft Office. Refer to the next section for instructions on opening the Full Editor from the Mini Editor in Microsoft Word or PowerPoint.
2.1 Inserting math into the document
- Place the cursor where you would like to insert the math.
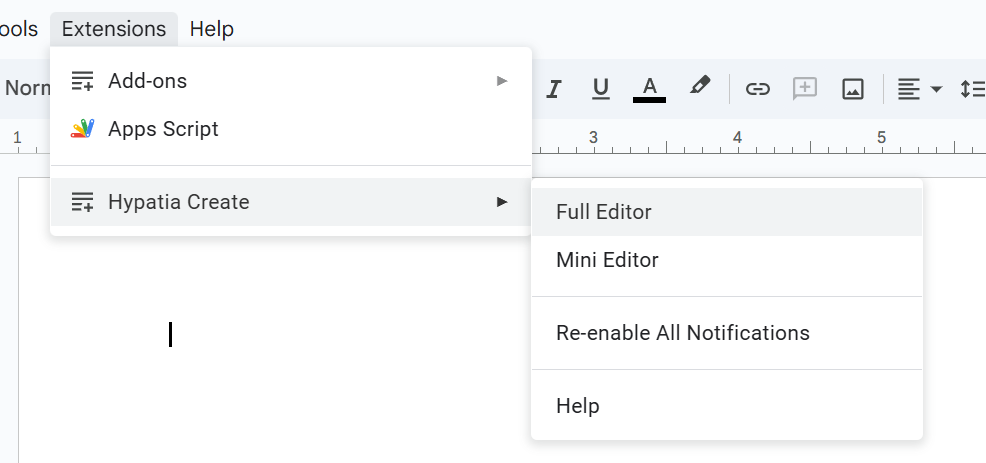
- Click Add-ons > Hypatia Create > Full Editor.
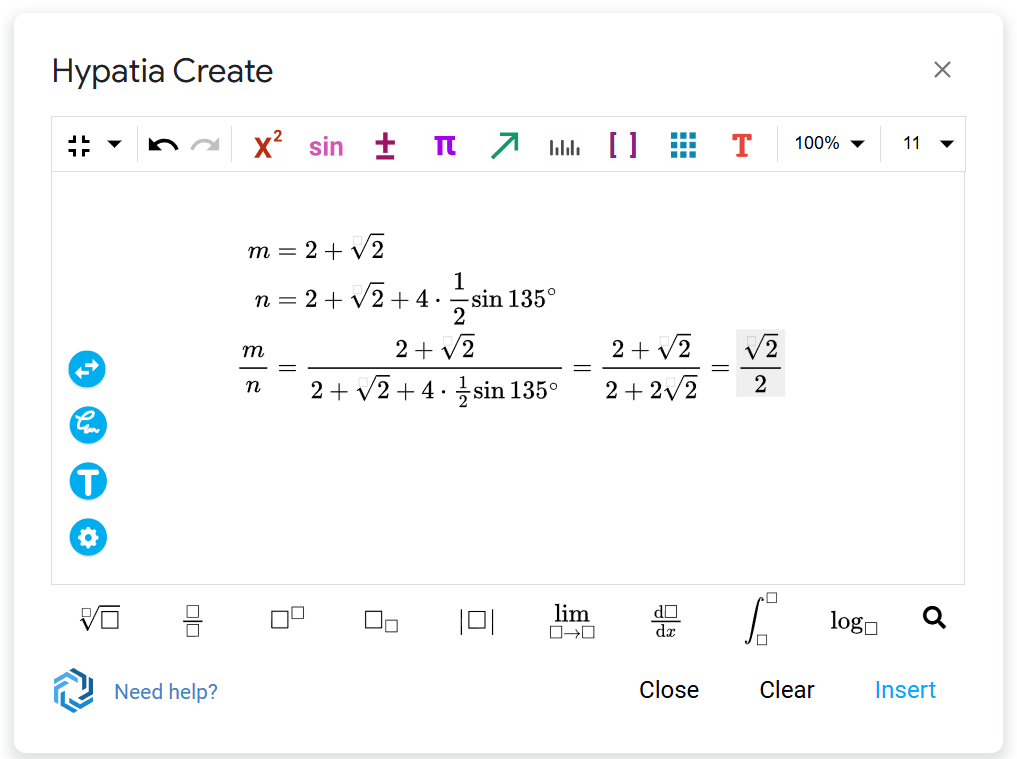
- The Hypatia math editor opens. Use it to create the math you would like to insert. When you are done, click the Insert button.
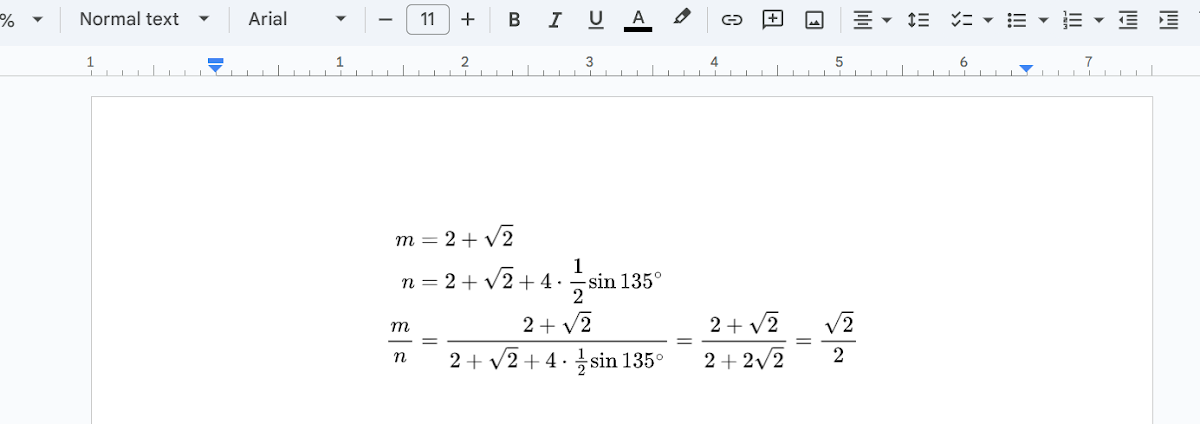
- The math you created is now inserted into the document.
2.2 A note about inline equation alignment
Inline equations are not vertically aligned with the surrounding text. You may notice that they appear slightly higher than the adjacent text.
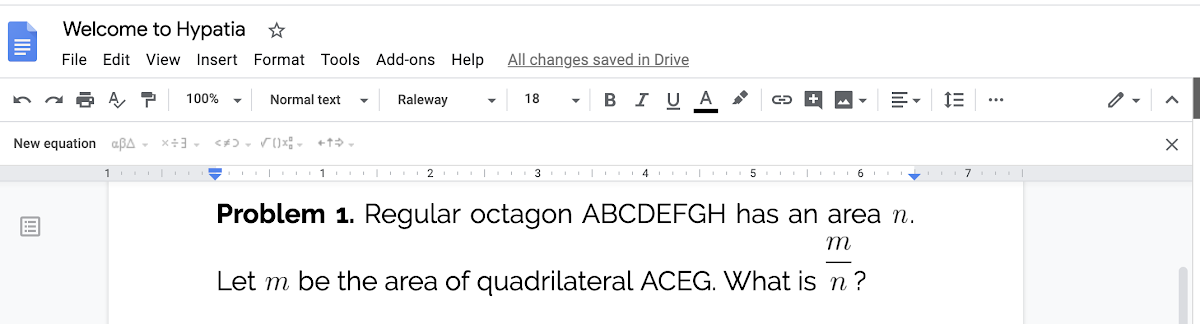
This is due to a restriction in Google Docs. If, in the future, Google changes this behavior, this alignment using Hypatia Create will improve.
In Microsoft Word, the inline maths are vertically aligned, but only in the desktop version. The online version of Microsoft Word currently does not support this alignment.
2.3 Editing math in the document
- Select the math you would like to edit in the Google document. If the Hypatia Create editor is not open, select Add-ons > Hypatia Create > Full Editor.
- The math will load in the Hypatia math editor, where you can make edits. When you are done, click the Update button.
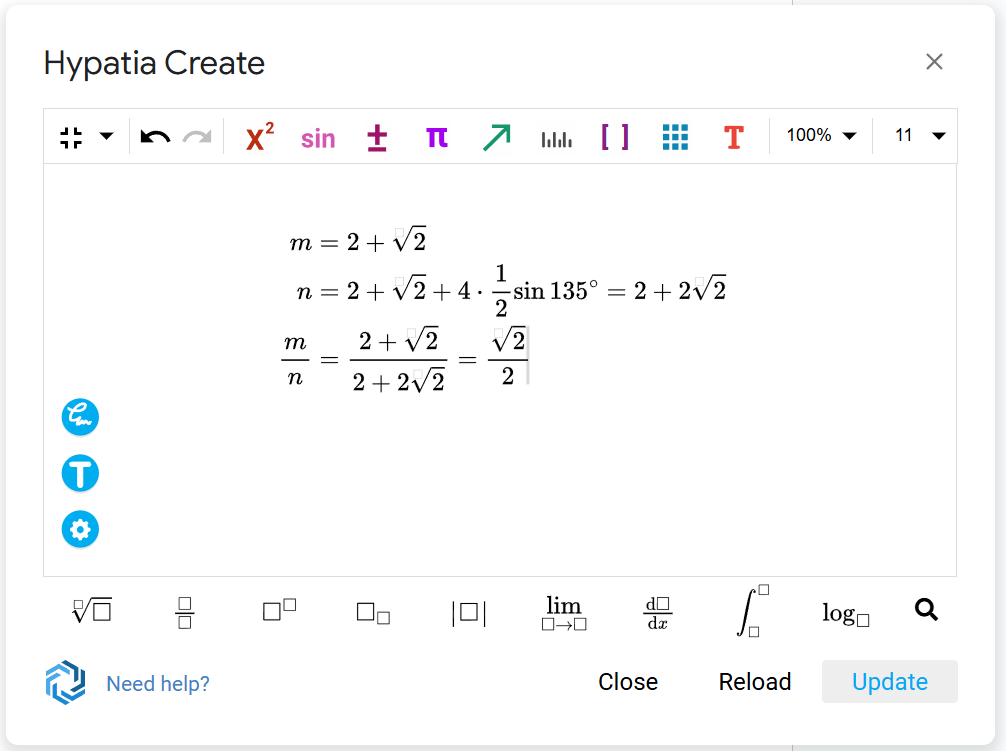
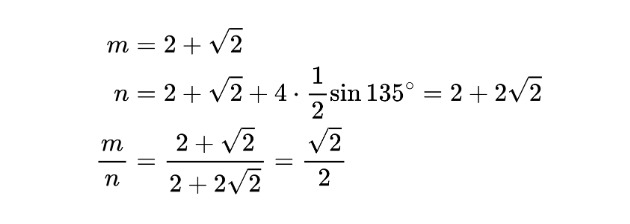
- The edited math replaces the previous version.
3 Using the Mini Editor (sidebar)
3.1 Opening the sidebar
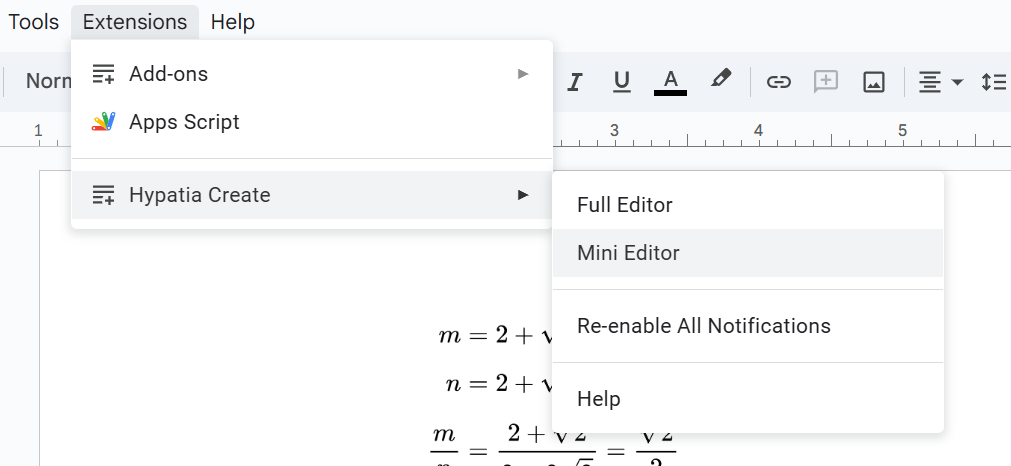
- Click Add-ons > Hypatia Create > Mini Editor.
3.2 About the Sidebar
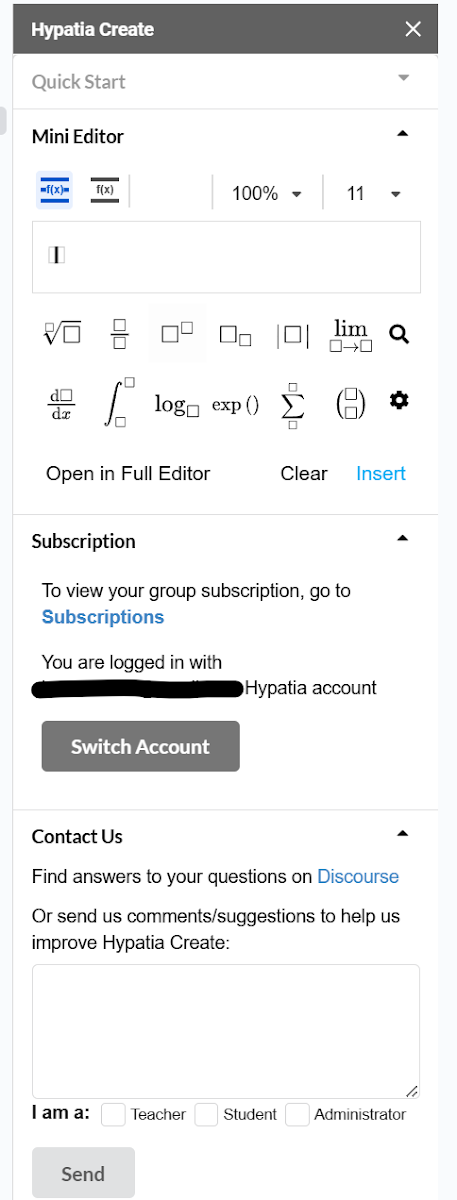
The sidebar contains several useful options and features in a place easily accessible to the user.
- Quick Start: A collection of tips for new users on how to quickly start using the editor.
- Mini Editor: A tiny editor useful for editing short math. Using this editor is faster than opening the Full Editor but the Mini Editor is more limited in what you can do.
- Subscription: You can check your subscription status here or switch to which Hypatia account you are connected to.
- Contact Us: You can send us messages with your concerns or suggestions. Please allow 1-2 business days for a response. We will respond by email from [email protected].
3.3 Inserting math with the Mini Editor
- Place the caret where you would like to insert math (for centered math start a new paragraph).
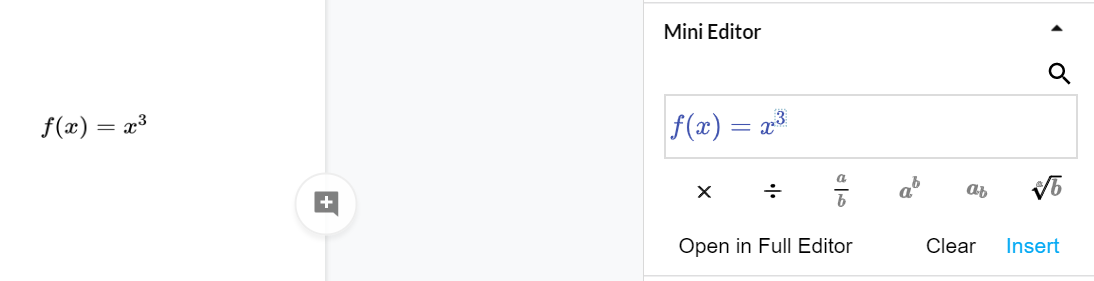
- Type the math you would like to insert in the Mini Editor. When you are done, click the Insert button.
- The math you created is now inserted into the document.
3.4 Editing math inside the Mini Editor
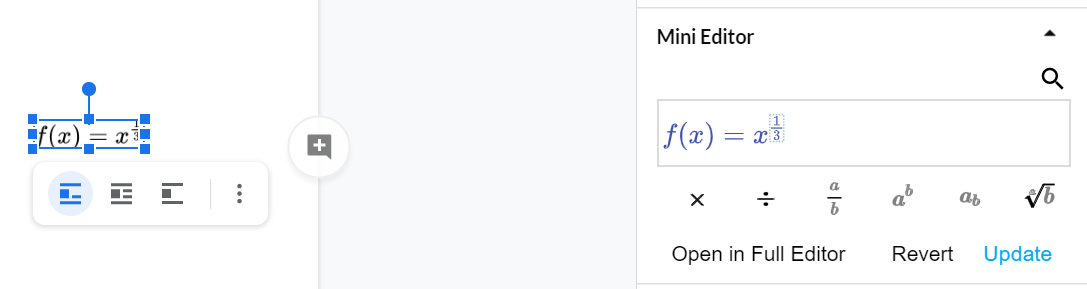
- Select the math you would like to edit. (Larger math may be opened in the Full Editor as usually more space is needed for its editing).
- The Mini Editor automatically loads the selected math. Edit the math and when you are done, click the Update button.
- The math you edited now replaces the selected math.
3.5 Switching to the Full Editor
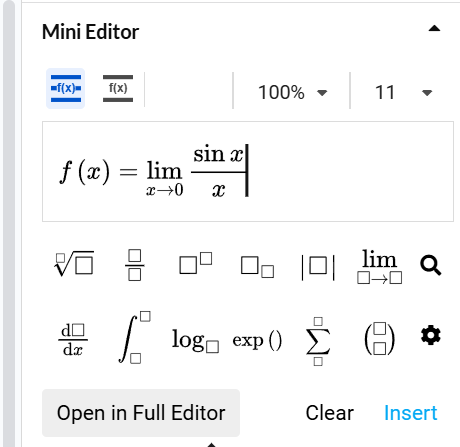
- Click Open in Full Editor to open the math currently in the Mini Editor in the Full Editor.
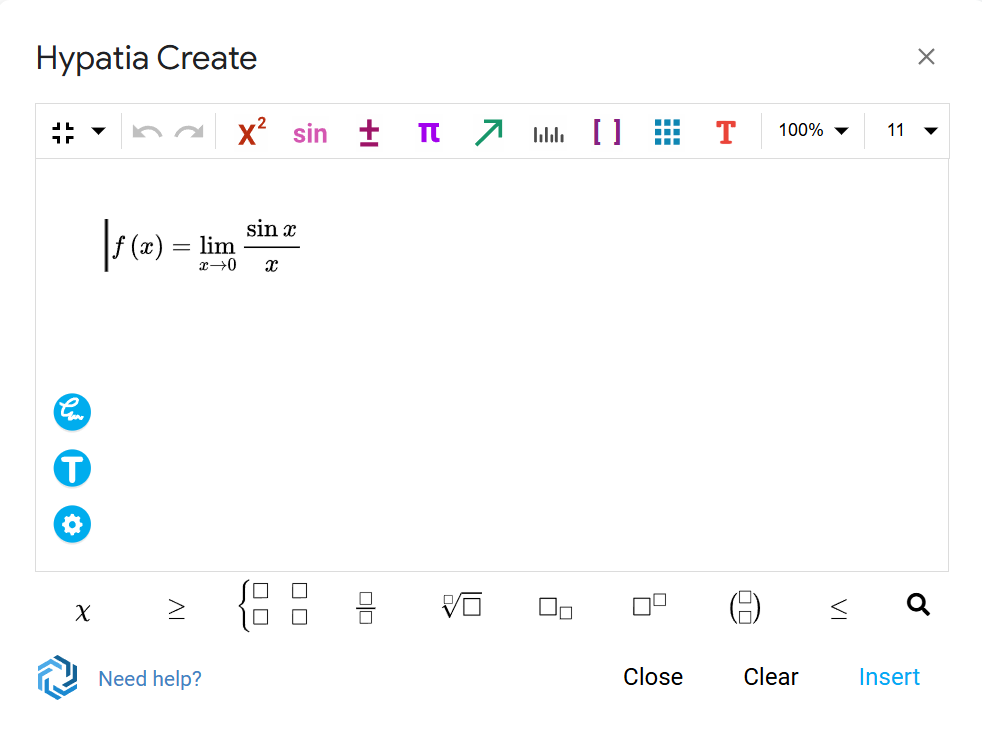
- The Full Editor opens with the math from the Mini Editor displayed.
4 More About the Full Editor
4.1 About the toolbar
The toolbar contains many of the supported math symbols organized into convenient submenus.

 | Commonly used functions and symbols.E.g. α, β, sin, cos, sum, product, integral, derivative |
|---|---|
 | Trigonometric functions, calculus, algebra.E.g. cos, sin, tan, log, ln, gcd, det |
 | Binary relations and operators.E.g. +, =, ⊂, ≤, ∈ |
 | Greek AlphabetE.g. α, β, γ, δ, ε, ζ |
 | Miscellaneous SymbolsE.g. →,⇒,∞,ℚ, ℝ,ℤ |
 | UnitsE.g. cm, m, km, m2, m3, L, sec, g, kg |
 | BracketsE.g. (, |, {, [, < |
 | Matrices and casesE.g. matrices with brackets/parentheses, determinants, tables |
 | Annotations and colorsE.g. colors, comments, overtext, undertext, cancel with |
4.2 Using the toolbar to insert math symbols
- Place the caret where you would like to insert the math symbol.
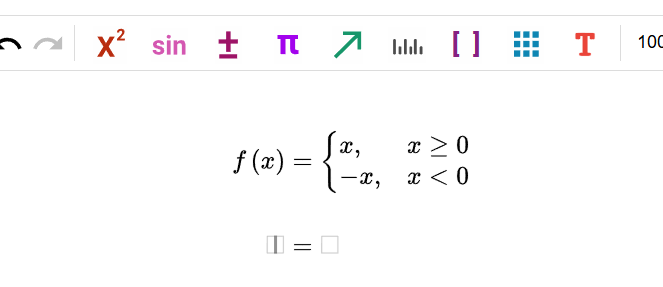
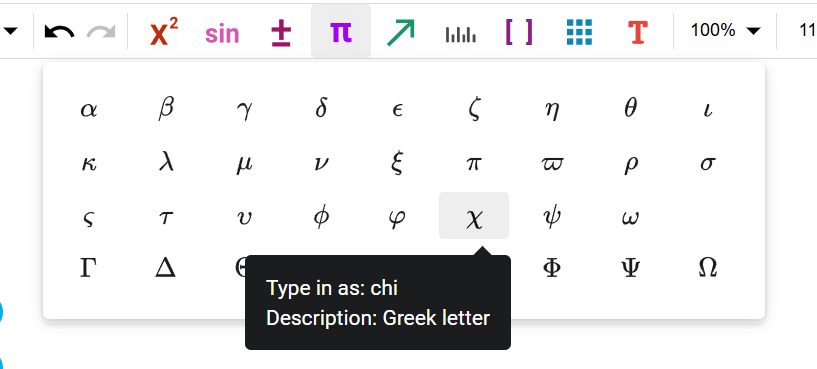
- Click on the toolbar to open the submenu you want, then click on the symbol you would like to insert.
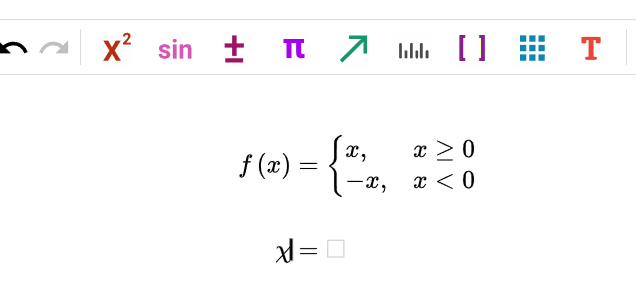
- The symbol you selected in the toolbar is now inserted at the caret position.
4.3 About the toolbox
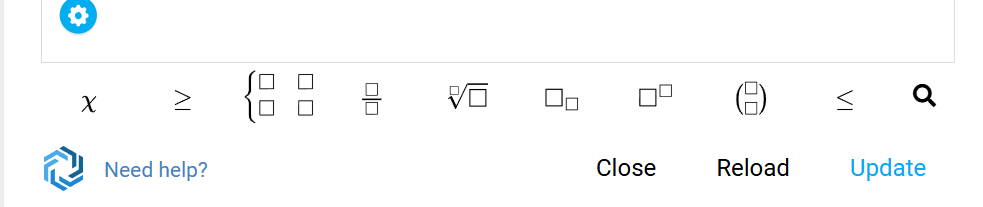
The toolbox will display the most recently used math symbols at the bottom of the editor.
4.4 Showing/hiding the toolbox
- Click the
 button to open the Context Menu.
- Toggle the Show Toolbox checkbox.
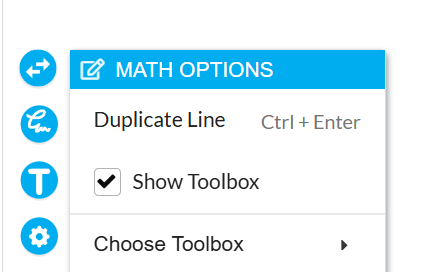
- From the same menu, you can also choose which toolbox to display.
4.5 Using the toolbox
- Place the caret where you would like to insert a symbol.
- Click on the symbol in the toolbox you would like to insert.
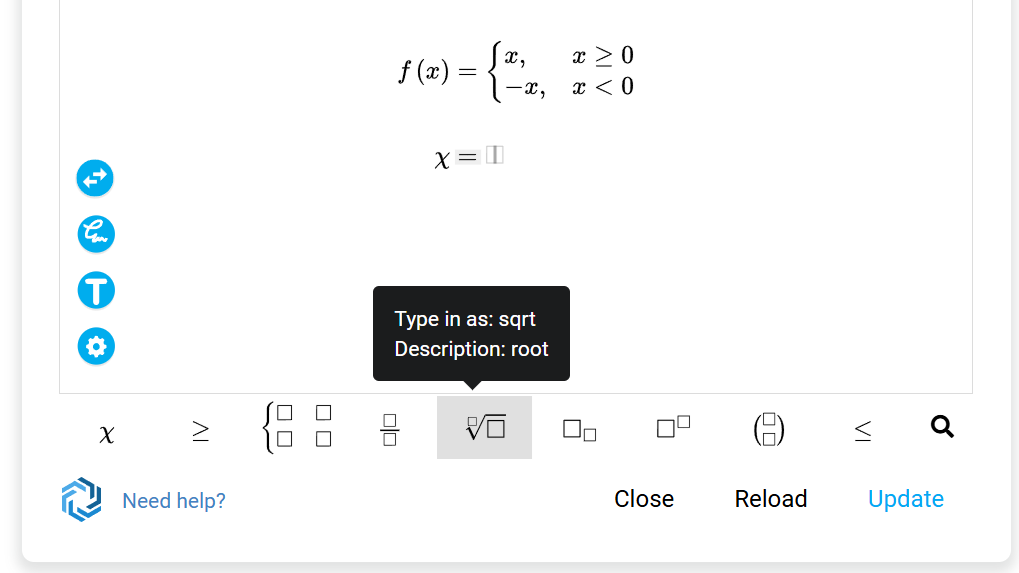
- The symbol you clicked in the toolbox is now inserted at the cursor position.
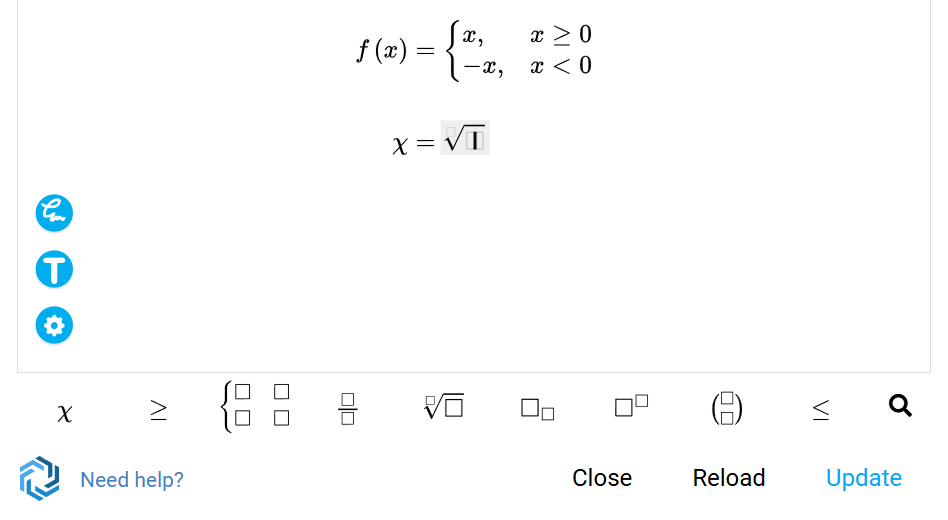
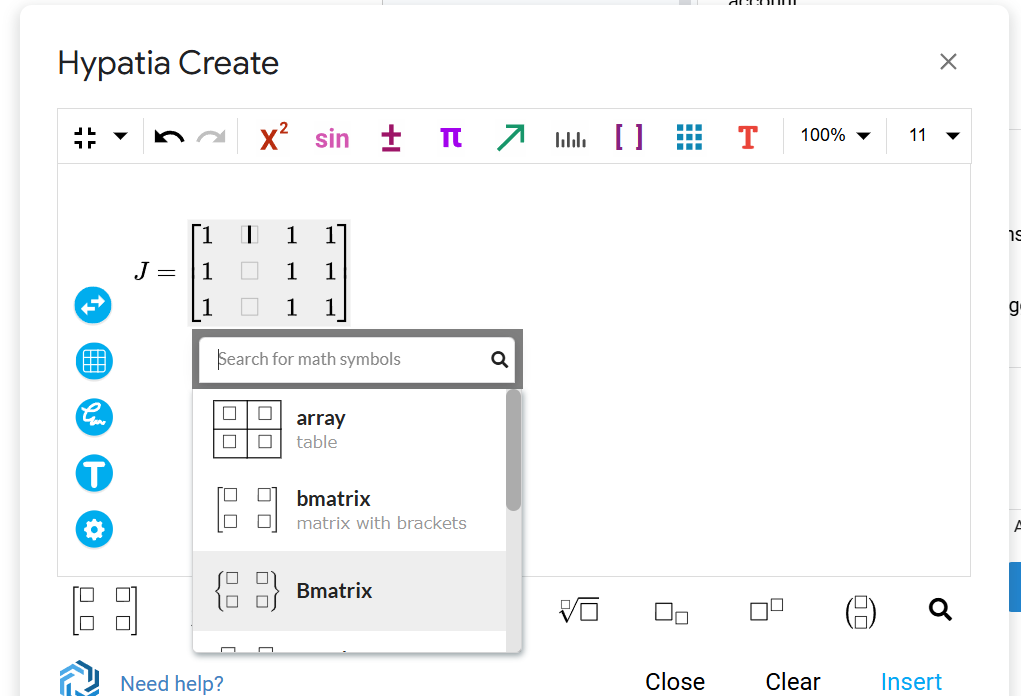
4.6 Using the search menu
Please note that the search menu contains the full list of symbols that we support, even symbols that are not available in the toolbar or toolbox.
- Place the caret where you want to insert a symbol.
- Press the '
\' key on your keyboard to open the search menu, or click the loupe icon in the toolbox.
- Start typing the name of the math symbol you want to insert, then click it.
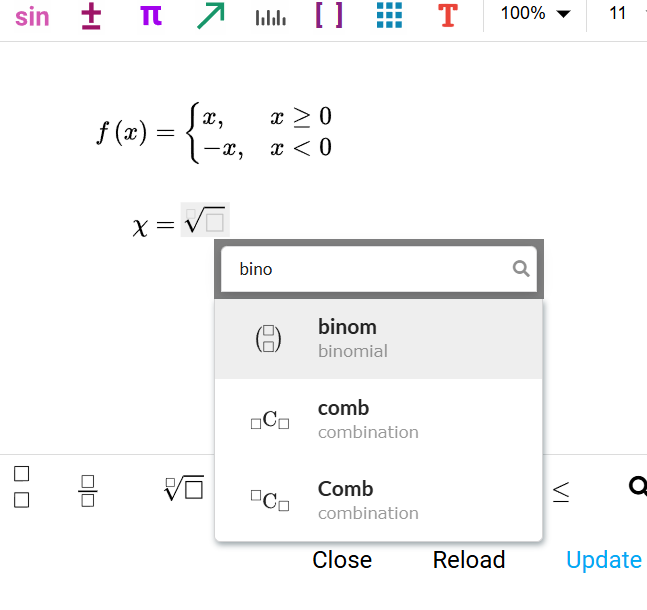
- The symbol you selected will be inserted at the cursor position. You can also press ENTER to insert the first search result, or use the arrow keys to select a different option.
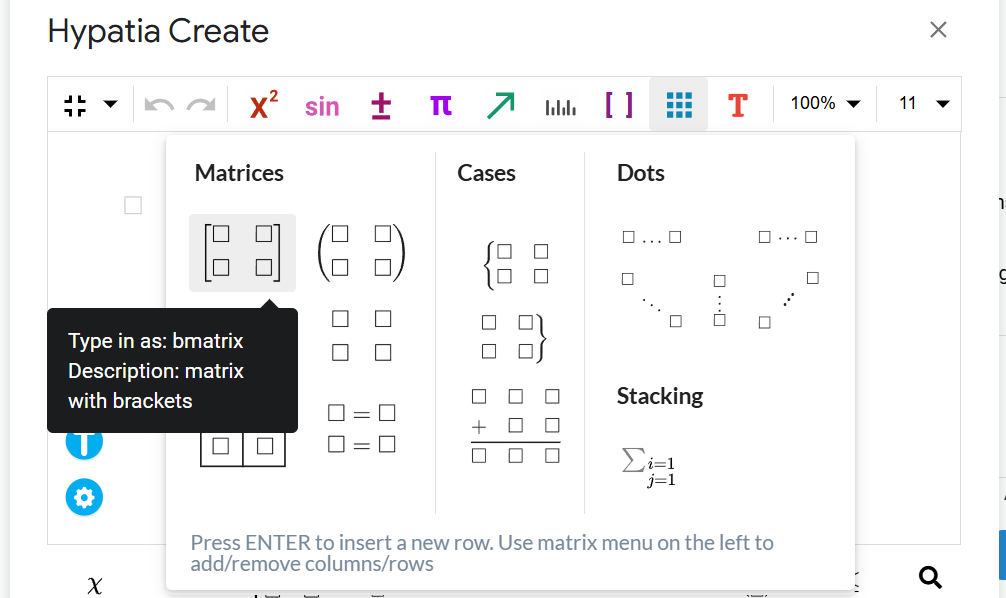
4.7 Inserting matrices
- Place the caret where you would like to insert the matrix.
- Click the toolbar button, then click on the type of matrix you would like to insert.
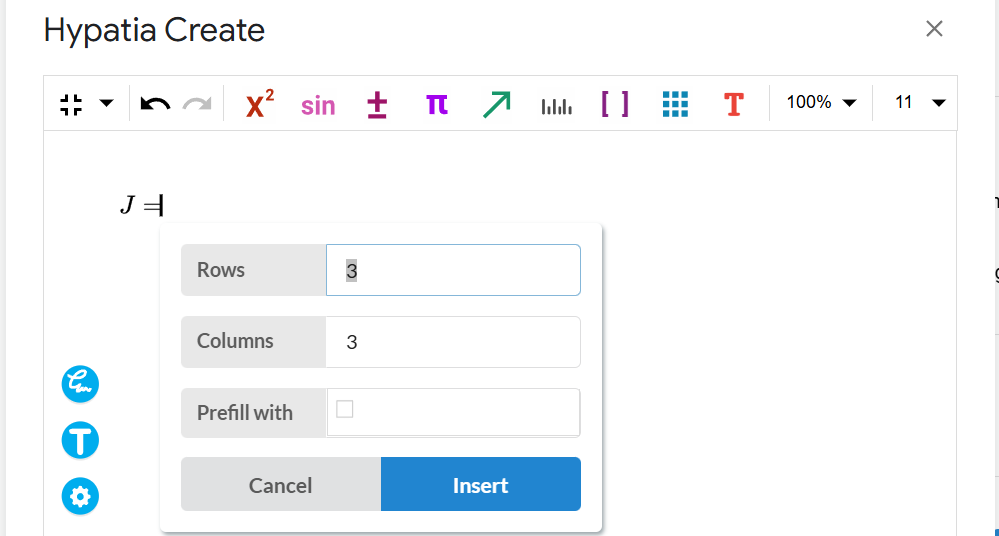
- Enter the number of columns and rows you want the matrix to have.
- The matrix you specified is now inserted at the cursor position.
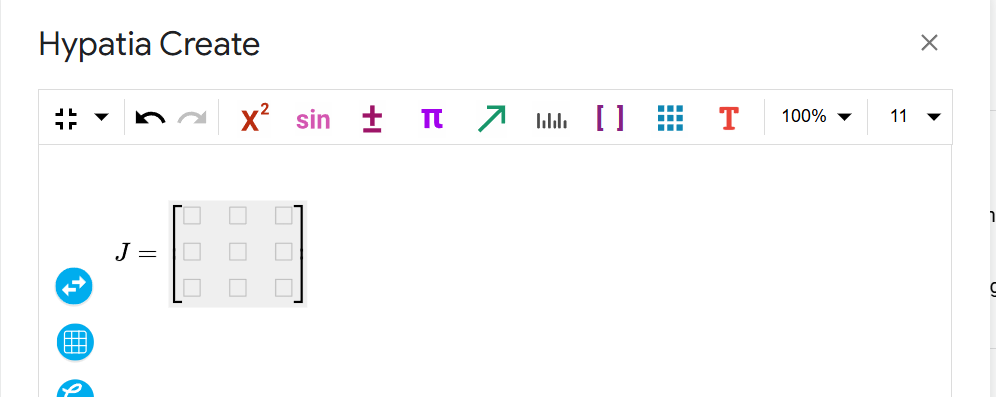
Notes:
- You can use the TAB key to move along the positions in the matrix and insert entries.
- You can prefill the matrix with an expression.
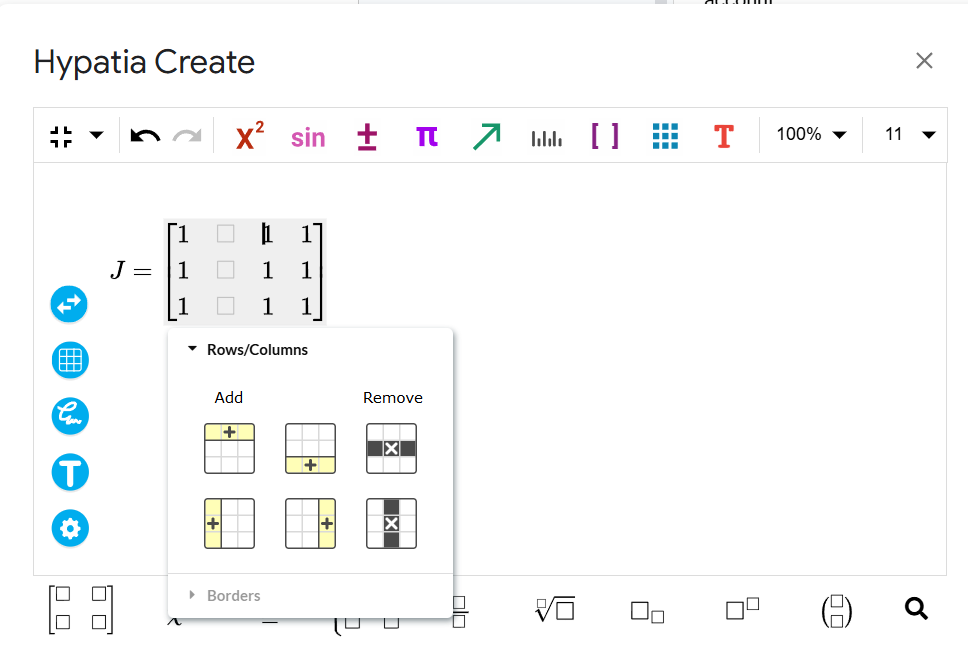
4.8 Modifying matrices
- Place the caret in the matrix you would like to modify.
- Click the
 button to open the Modify Matrix Menu. From this menu, you can add/remove borders and add/remove rows and columns.
- Click the option for the type of modification you would like to make.
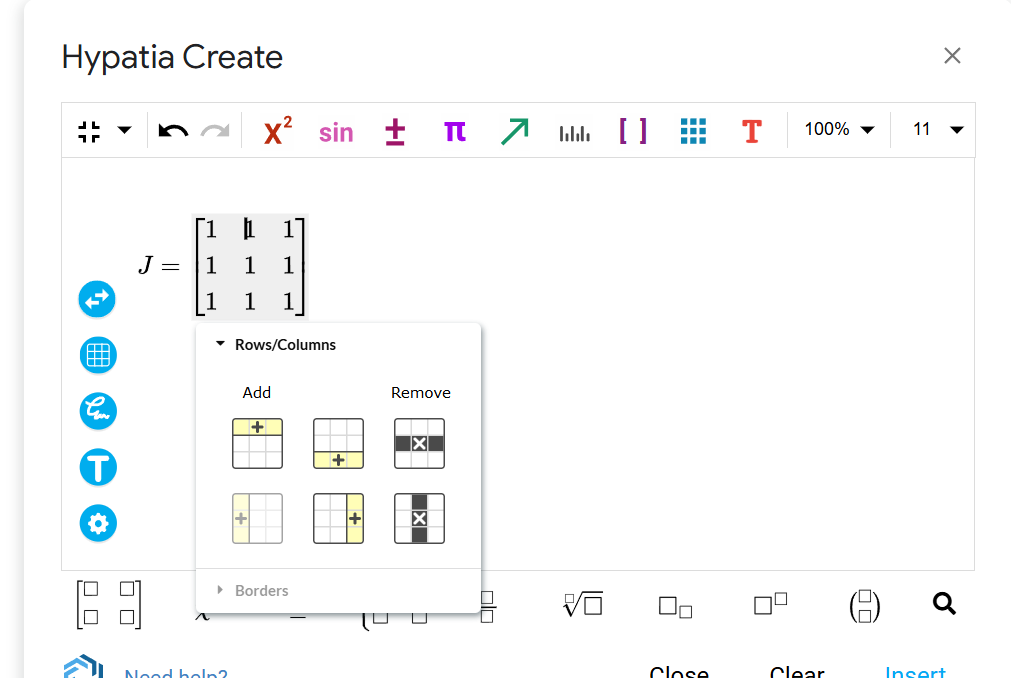
- The matrix is now modified according to the option you chose.
4.9 Exchanging math symbols
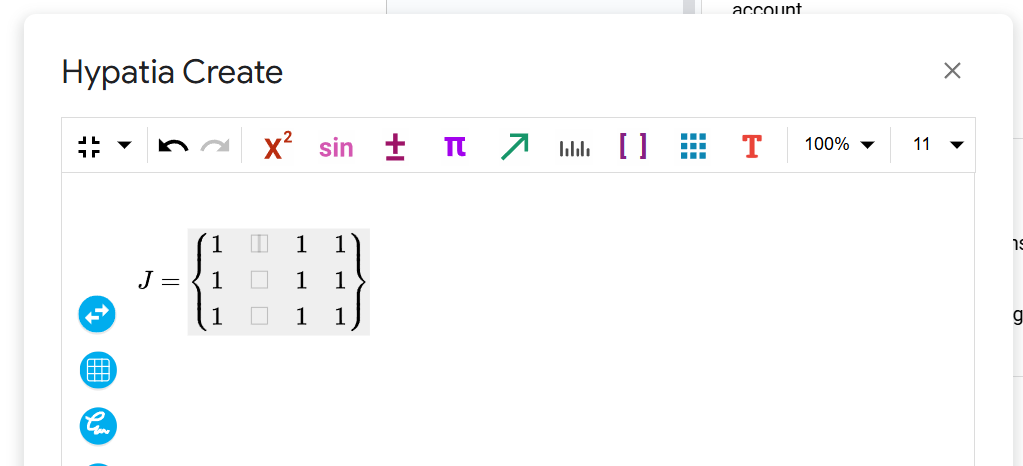
- Place the caret in the math symbol you would like to exchange
- Note: Not all symbols can be exchanged.
- Click the
 button to open the Math Exchange Menu, then click on the math symbol you would like to exchange for.
- The math symbol is now replaced with the one you selected.
4.10 About math layouts
Types of single-line math:
- Inline mode: Math that typically appears alongside the text. It is typeset to minimize the height.
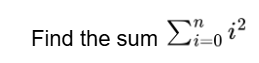
- Display mode (default): Math that typically appears on a separate line and is centered. It is typeset to improve clarity.

Types of multi-line math:
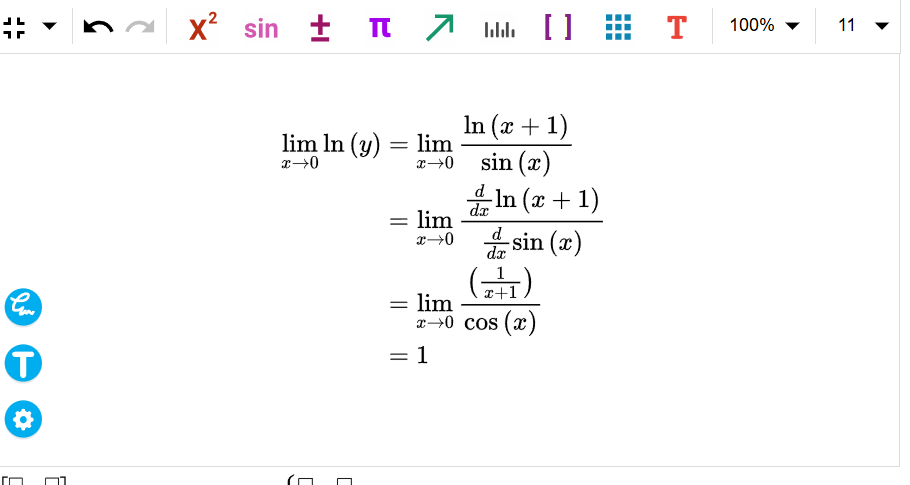
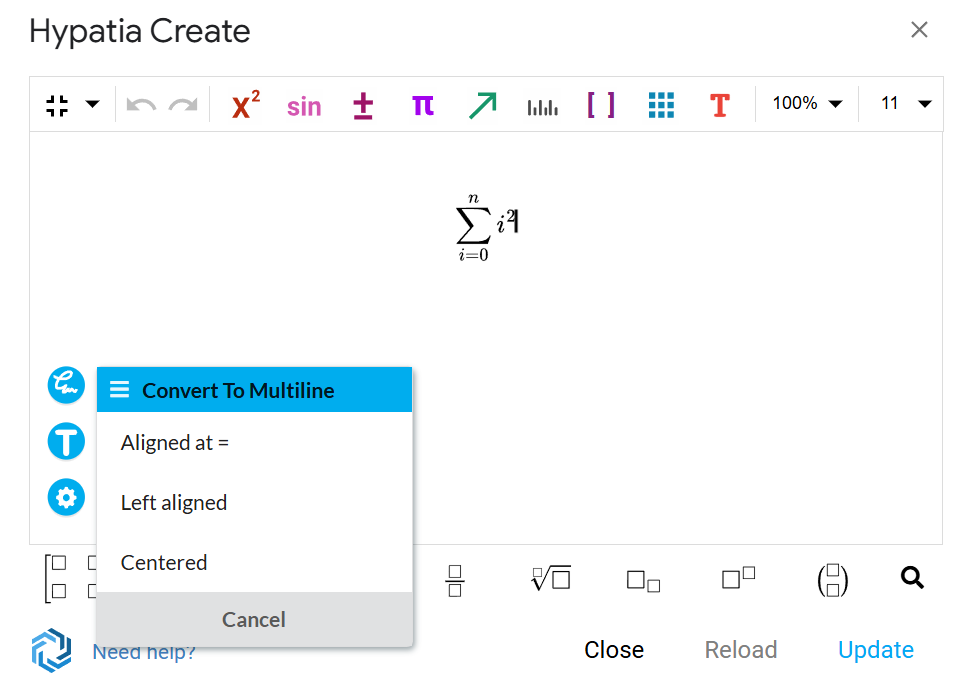
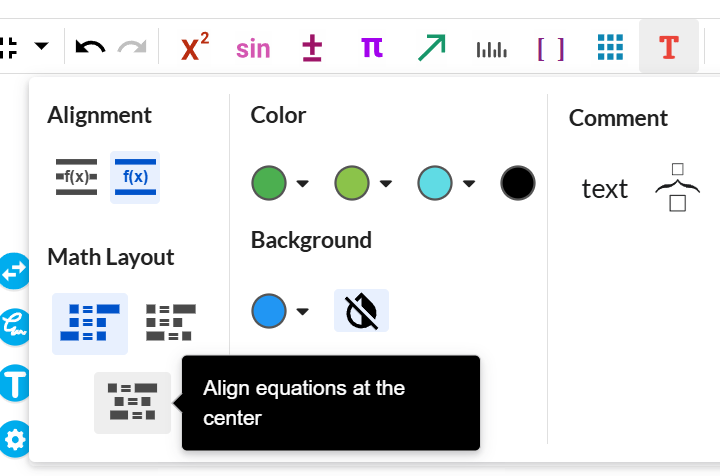
- Aligned equations: lines aligned at their equal signs.
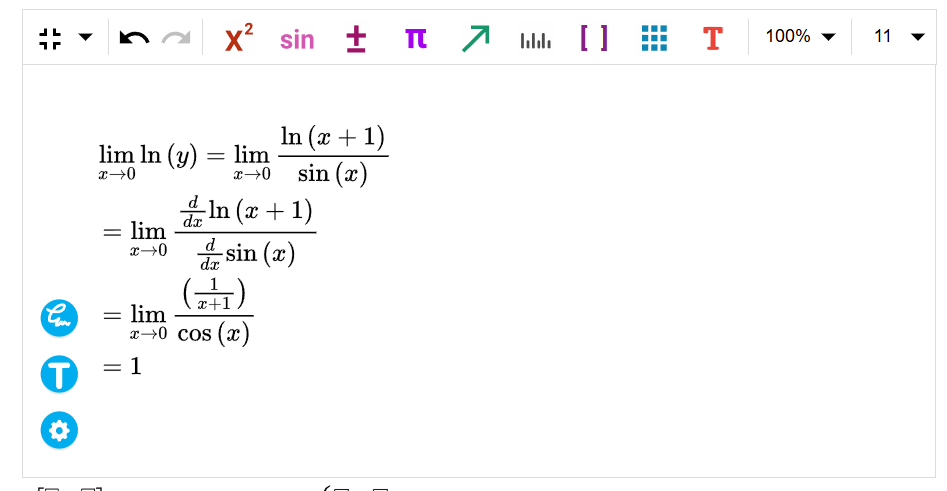
- Left-aligned equations: lines aligned to the left.
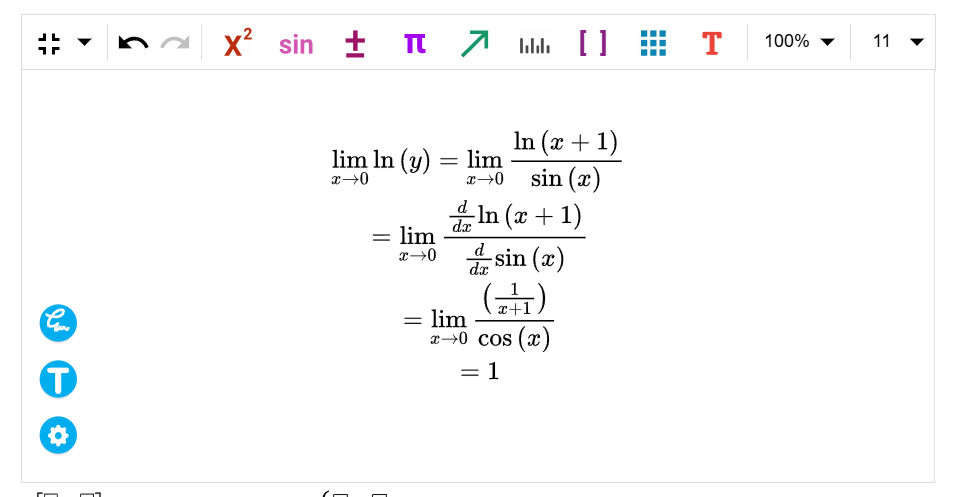
- Centered equations: each line centered.
4.11 Changing the math layout
- Open the
 menu.
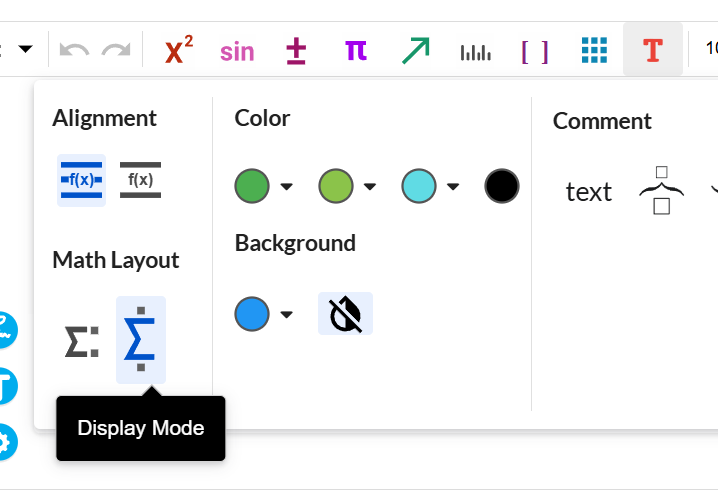
- Under Math Layout you will see buttons representing available math layouts.
- For single-line math, you can choose between these two options:
- To convert single-line math to multi-line math, press ENTER, then choose from the available options:
- For multi-line math, there are three options:
5 Math Shortcuts
5.1 Keyboard Shortcuts
| Windows/Linux | Mac | |
|---|---|---|
| Copy | Ctrl + C | Cmd + C |
| Cut | Ctrl + X | Cmd + X |
| Paste | Ctrl + V | Cmd + V |
| Select All | Ctrl + A | Cmd + A |
| Undo | Ctrl + Z | Cmd + Z |
| Redo | Ctrl + Y | Cmd + Shift + Z |
| Insert/Update Math | Ctrl + I | Ctrl + I |
| Switch between Text and Math Modes | Alt + T | Opt + T |
| Math Symbol Search | \ | \ |
| Duplicate Line or Expression | Ctrl + ENTER | Ctrl + ENTER |
| Fraction | Alt + / | Opt + / |
| Toggle Subscript | Ctrl + , | Ctrl + , |
| Toggle Superscript | Ctrl + . | Ctrl + . |
| Text Color 1 | Alt + 1 | Opt + 1 |
| Text Color 2 | Alt + 2 | Opt + 2 |
| Text Color 3 | Alt + 3 | Opt +3 |
| Remove Text Color | Alt + 0 | Opt + 0 |
5.2 Autoconvert (Shortcut sequences)
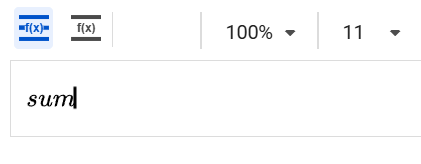
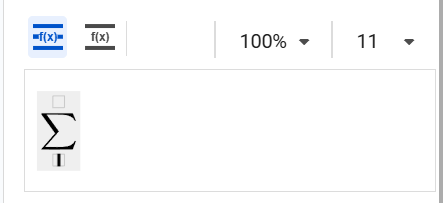
This feature allows each symbol to be inserted by typing its shortcut sequence and then pressing the SPACE key. For example, typing sum and SPACE will insert the summation symbol:
→
- Most common shortcuts:

frac
sqrt
sum
int
limbinom
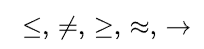
<=, <>, >=, ~~, ->
- Automatic function conversion: Most functions will automatically convert to their corresponding symbols. For example,
log,sin,mod, etc.
- Greek letters: Typing the name of Greek letters, for example,
alpha,Gamma, etc, will produce the corresponding symbol.
- Finding additional shortcuts: To find other shortcuts, you can either hover over the symbol in the toolbar or toolbox
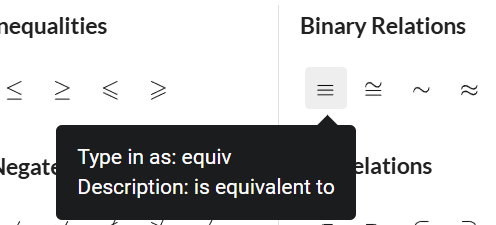
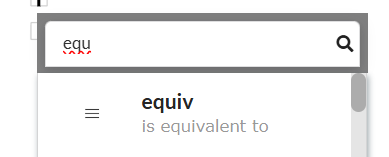
and check Type in as sequence, or use Math search to find the symbol, then check the sequence in the first row of the right column:
- Undoing unwanted conversion: If an unwanted conversion occurs, you can use the Undo command to revert the conversion.
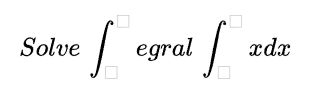
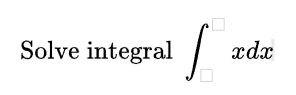
Text mode: To prevent automatic conversions when typing text, switch the editor to "text mode" by clicking  icon. The color of the icon indicates which mode the editor is currently in. For example, typing “
Solve integral intxdx” in math mode would result in: By switching to text mode first and typing “Solve integral”, then switching to math mode and typing the rest, you will produce the desired output:
6 Troubleshooting
6.1 Google Workspace: the Hypatia Create menu shows only “Help”
If Extensions > Hypatia Create has no items except Help, work through these steps in order.
- Reload the document, then give the menu a few seconds to finish loading. This is normal the first time after installing, and it clears most one-off failures.
- If only Help is still showing, open a different document. If Hypatia works there, only the first document is affected, so continue with step 3. If no document works, try a browser window signed in to this account only; if it still fails, write to us and tell us which documents you tried.
- Clear the “Use in this document” flag on the affected document, as described below.
If you can see the Hypatia Create tile:
- Open Extensions > Add-ons > Manage add-ons
- Click the three dots on the Hypatia Create tile
- Uncheck “Use in this document”
- Reload the document
If there is no tile, because the add-on was installed for your whole organization:
- Share the document with a personal (non-organization) Google account, as Editor
- Open the document from that account and follow the four steps above
- Return to your school account and reload the document
You do this once per affected document; your other documents are not affected.
Why it happens: the “Use in this document” flag binds to whoever first enabled the add-on in that document. When that was a different installation from yours, Google cannot resolve it and stops before our add-on runs, which is why Google’s own Help item is the only thing left in the menu. We reported this to Google in September 2024 and it is still open. Starring the issue may help get it prioritized: https://issuetracker.google.com/issues/369900056
6.2 Google Workspace: Hypatia Create will not start
If Hypatia Create does not start and keeps showing one of these messages:
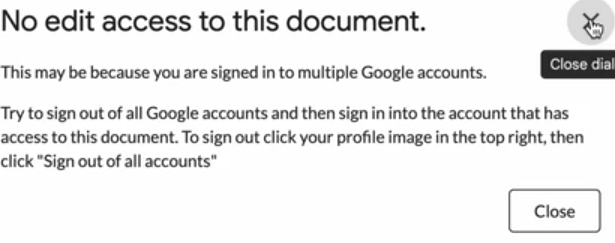
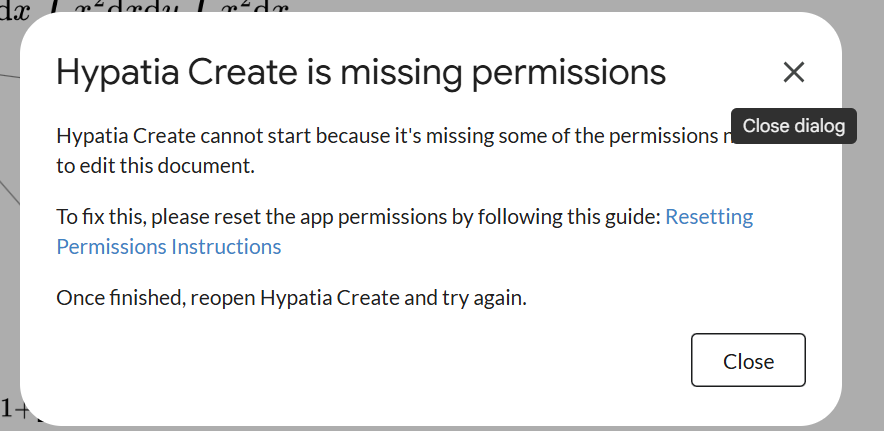
first make sure you are signed in to only one Google account — the one that has edit access to the document. If that is already the case, reset the Google permissions for Hypatia Create:
- Go to myaccount.google.com/connections.
- Find and click Hypatia Create.
- Click Delete all connections you have with Hypatia Create and confirm.

- Open the add-on again. A dialog appears saying Authorization required — click OK.
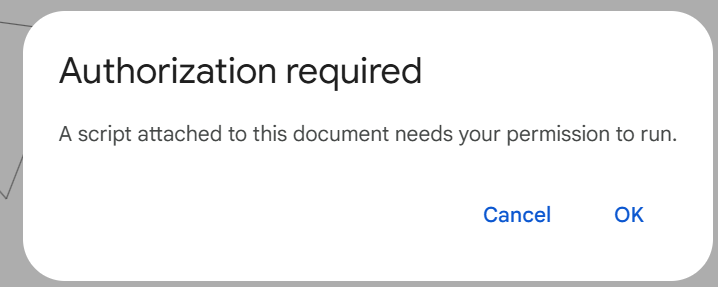
- In the next dialog, choose the same Google account you use with Google Workspace.
- In the dialog after that, click Continue.
- In the last dialog, click Select all to grant every permission, then click Continue.
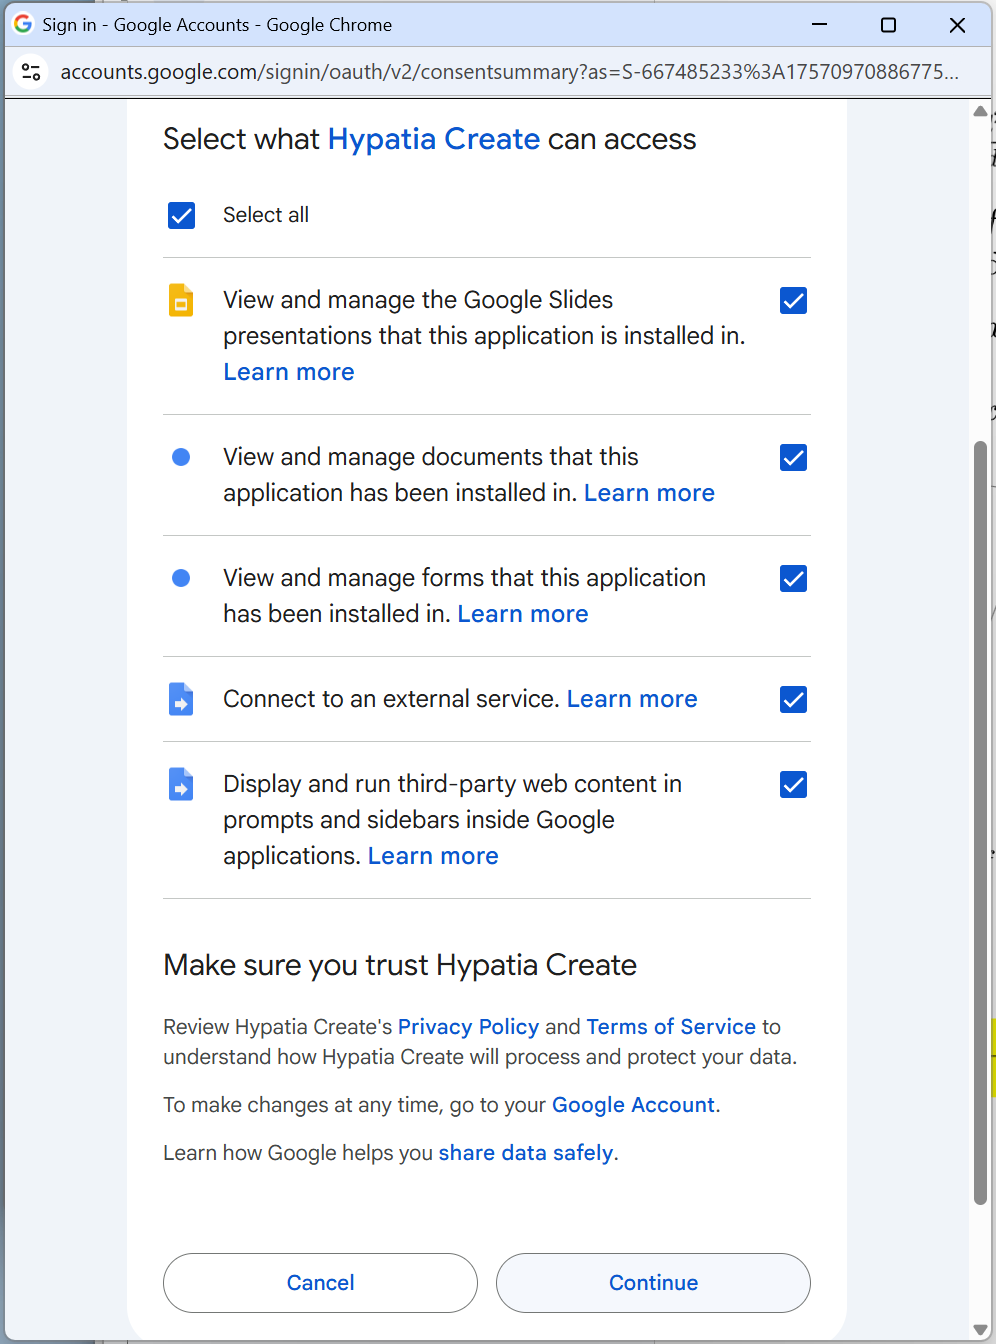
Hypatia Create should now open.
6.3 Google Workspace: signing in fails
After you click Log in in the add-on, a new browser tab opens where you sign in, and you should then be returned to a confirmation page. If an error page appears instead — or the add-on itself reports a problem — the message says what needs fixing.
“We are sorry, but you do not have access to Google Apps Script. Please contact your Organization administrator for access.”
Your school or organization's Google Workspace administrator has turned Apps Script off for your domain. Hypatia Create runs on Apps Script, so it cannot work until that is switched on. Ask your administrator to enable it:
Admin Console → Apps → Google Workspace → Drive and Docs → Google Apps Script → set to ON, either for the whole organization or at least for the organizational unit you are in.
“Authorization is required to perform that action.”
This one has two common causes.
- A missing permission. When you authorize Hypatia Create, Google lets you allow or decline each permission separately, and the add-on needs all of them. Reset its permissions as described in 6.2 above, and make sure every box is ticked before you confirm.
- More than one Google account. The add-on may be signing in as a different account from the one you use with Hypatia Create. Sign out of all Google accounts — in Google Docs, Slides or Forms click your profile picture at the top right and choose Sign out of all accounts — or use a different browser. Then sign back in to the one account you use with Hypatia Create and try again.
“Your administrator has blocked Hypatia Create”
Here the permissions are granted and your subscription is fine: a Google Workspace policy is stopping the add-on from reaching our server. Ask your IT administrator to allow Apps Script requests to hypatiasys.com. The error they need to look for is UrlFetch calls to https://hypatiasys.com/... are not permitted by your admin.
If you need Hypatia Create before your administrator can do that, you can sign in with a personal Google account instead. A subscription is linked to one Google account at a time, so write to [email protected] first and we will make sure you can move it back afterwards.
If you see a different message, or none of this helps, send us a screenshot of the page that appears immediately after sign-in — a short screen recording of the whole sign-in is even more useful. The exact message tells us where it is failing. You can reach us from Contact us in the add-on, or on the community forum.
7 Ask the community
Join the discussion on our community forum — ask questions, share tips, and get help from our team and other users.